


Video editing has become an indispensable skill, not only for filmmakers and content creators but also for professionals across various fields. From viral TikToks to cinematic masterpieces, the power of video editing shapes our visual world. Whether you’re looking to create compelling YouTube videos, marketing materials, or even short films, learning how to navigate any video editing program will give you the freedom to bring your ideas to life.
Here’s a secret: behind every captivating video lies a creator who once stared at a blank timeline, wondering where to begin. If that’s you right now, take a deep breath – you’re about to embark on an exciting journey into the world of video editing. With the right approach, learning any video editing program is achievable, even if you’re starting from scratch. If you’re just starting out, this guide will walk you through a practical, step-by-step approach to mastering any video editing software, regardless of your previous experience.
Step 1: Choose the Right Software Based on Your Goals
Before diving into video editing, it’s important to pick the right software based on your needs, budget, and skill level. Some popular video editing programs include:
- Beginner-friendly: iMovie, Adobe Premiere Rush, Filmora.
- Intermediate: Adobe Premiere Pro, Final Cut Pro, DaVinci Resolve.
- Advanced: Avid Media Composer, Adobe After Effects (for motion graphics).


When choosing your software, consider factors like:
- Platform compatibility: Does it work on your operating system (Windows/Mac)?
- Performance: Can your computer handle the software’s hardware requirements?
- Export settings: Does it offer multiple export options for different platforms like YouTube, Vimeo, or 4K rendering?
- Learning curve: Are there abundant tutorials and resources available?
Evaluate the platform based on your device, the type of videos you want to edit, and any specific features you might need. If you’re a complete beginner, starting with simpler tools can help you build foundational skills.
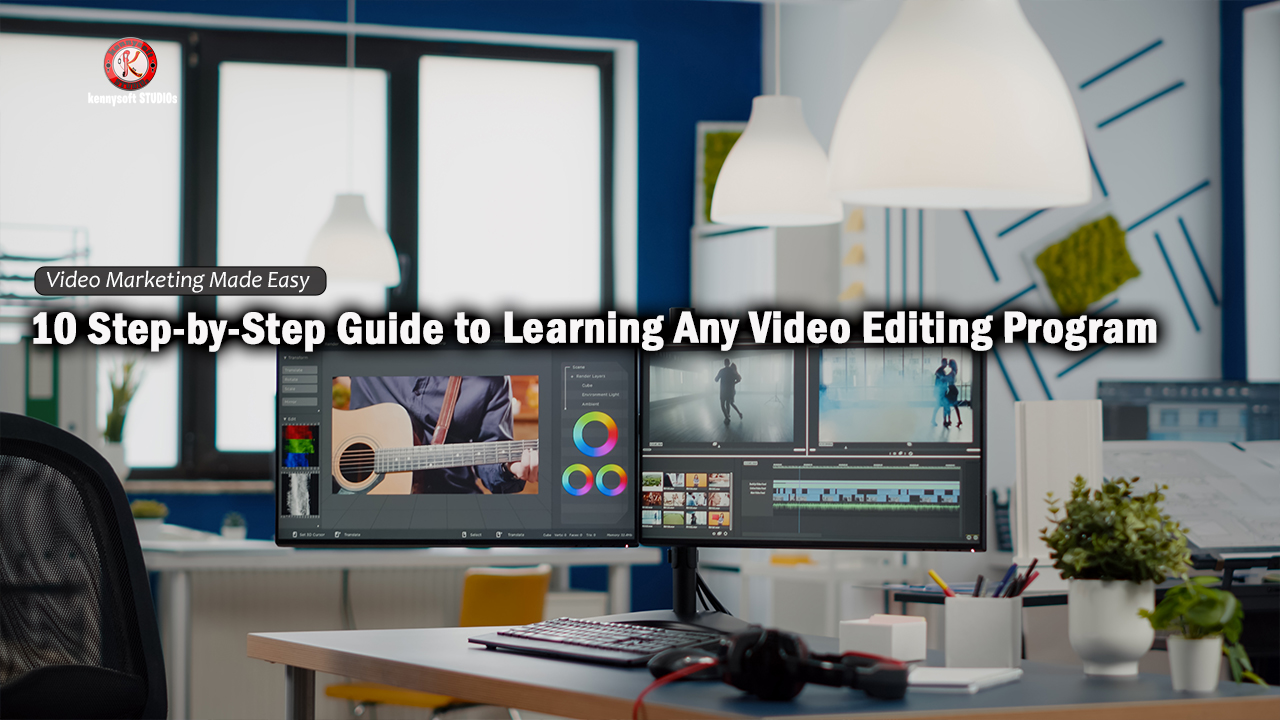
Step 2: Familiarize Yourself with the Interface
The first thing you should do when opening any video editing software is to take time to explore its user interface. Most programs share similar components, though they might be arranged differently. These include:
- Media or Project Panel: Where all your imported clips, audio, and assets are stored.
- Timeline/Sequence Panel: This is the heart of video editing, where you arrange and layer clips.
- Preview Window: Lets you see the playback of your timeline in real-time.
- Tools Panel: Contains functions such as cut, trim, zoom, and other editing tools.
Spend time clicking through each part of the interface. Many editing programs offer tooltips or onboarding tutorials for new users, guiding you through what each button does. Don’t rush this process—familiarity with your software’s layout will make your workflow smoother in the long run. Professional editors often customize their workspace. As you grow more comfortable, don’t be afraid to rearrange panels to suit your workflow. Your editing space should feel like a well-organized kitchen – everything you need within easy reach.
Step 3: Import Your Media Files and Organize Them
Now that you understand the interface, it’s time to import your media files (video clips, audio, images) into the program. Proper organization is key here:
- Create folders for different types of media (e.g., “Raw Footage,” “Music,” “Graphics”).
- Label your clips so you can quickly identify the footage you need.
- Back up your files in case something goes wrong with the project.
Organizing your files will save you from the frustration of searching for a particular clip or losing media during the editing process. Once imported, you can drag clips onto the timeline and start creating your sequence.
Step 4: Learn and Master the Basics of Video Editing
Begin by learning basic editing skills. Most video editing tasks revolve around the following core techniques:
- Cutting and Trimming: Removing unwanted parts of your clips.
- Arranging Clips on the Timeline: Moving and sequencing your clips to create the story or message.
- Transitions: Adding fades or other effects between clips.
- Text and Titles: Placing text overlays like credits, intros, or subtitles.
- Basic Color Correction: Adjusting brightness, contrast, and saturation to improve visual quality.
- Audio Mixing: Make sure to adjust your audio levels. Lower the background music when someone is speaking or add sound effects for extra impact.
Use these tools to create a simple project to practice, such as a montage or a short sequence.
Step 5: Explore Advanced Features Like Color Grading and Effects
Once you’re comfortable with the basics, start exploring more advanced features such as:
- Color Correction/Color Grading: This involves adjusting exposure, contrast, saturation, and temperature to create the mood you want in your video. For instance, cooler tones might evoke a somber or serious atmosphere, while warmer tones feel upbeat and inviting.
- Motion Graphics and Animation: Many video editing programs allow you to animate text, logos, or objects within the video. These effects can add a layer of professionalism to your content.
- Green Screen (Chroma Key): This tool lets you replace the background of a video shot with a green screen. It’s often used for special effects, interviews, or explainer videos.
This is where practice makes perfect. Use these tools sparingly at first and experiment to see how they enhance your projects.
Step 6: Practice on Simple Projects
The best way to learn is by doing. Start with simple projects, such as editing a short montage or a vlog. This will allow you to experiment with the full workflow—from importing clips to cutting, adding transitions, audio editing, and exporting the final product.
To guide your practice, try these projects:
- Create a 30-second highlight reel using clips from a trip or event.
- Edit a promotional video with a combination of video, images, and text overlays.
- Put together a short tutorial video with voiceover narration and screen recording.
The more you edit, the more efficient and confident you’ll become in using the software.
Step 7: Learn Keyboard Shortcuts and Improve Your Workflow
Once you’ve grasped the core editing tools, it’s time to improve your speed. Keyboard shortcuts are essential for streamlining your workflow. While every program has its own set of shortcuts, here are some common ones across platforms:
- Ctrl/Cmd + C/V: Copy and paste clips.
- Ctrl/Cmd + Z: Undo.
- Spacebar: Play and pause the preview.
- Ctrl/Cmd + S: Save your project (frequently!).
Most programs allow you to customize these shortcuts, so you can tailor them to your needs and preferences.
Step 8: Leverage Online Resources and Tutorials
No matter how intuitive the software is, you’ll likely encounter challenges as you move to more complex editing. That’s where online resources come in. Platforms like YouTube, Udemy, Skillshare, and even official program forums offer free or paid tutorials that can help you with specific tools, effects, or project types.
Here’s what you can learn from these resources:
- How to improve your editing style.
- Specialized techniques (like multicam editing or motion tracking).
- Troubleshooting common issues (e.g., exporting problems, lag, or crashes).
Follow editing communities on Reddit, join Facebook groups, or dive into YouTube tutorials. The video editing community is vast and generally very supportive of newcomers. By seeking out these resources, you can avoid wasting time troubleshooting and gain inspiration for new editing techniques.
Step 9: Export and Review Your Final Project
Finally, after all the editing, you’ll need to export your video. Each platform has different export options depending on where your video will be hosted. For example:
- Social media (YouTube, Instagram): Export as MP4 with the H.264 codec.
- High-quality production: Export in ProRes or another high-bitrate format for professional use.
After exporting, watch your video through a few times, checking for any errors in transitions, audio sync, or color correction. Review it with fresh eyes and get feedback from others if possible.
Step 10: Stay Updated with New Features
Video editing software regularly updates with new features and improvements. To stay competitive, it’s important to keep your skills sharp by learning about these updates. Subscribe to newsletters from your software provider or follow blogs and channels dedicated to video editing. Keeping up with trends and new tools will make you a more versatile editor.
The Editor’s Mindset: Thinking Beyond the Timeline
As you progress in your editing journey, you’ll realize that great editing happens as much in your mind as it does on the screen. Here are some tips to elevate your editing game:
- Watch with Intent: Start analyzing the editing in every video you watch. How long are the cuts? What transitions are used? How does the pacing affect your emotions?
- Tell a Story: Even if you’re editing a simple vlog, think about the narrative arc. Every video should take the viewer on a journey, no matter how small.
- Less is More: Sometimes, the most powerful edit is the one you don’t make. Don’t be afraid of letting a powerful moment breathe.
- Sound Design: The unsung hero of great videos. A well-placed sound effect can elevate a scene from good to unforgettable.
The Kennysoft Film Academy Advantage
At Kennysoft Film Academy, we don’t just teach software—we cultivate editors. Our comprehensive curriculum, state-of-the-art facilities, and industry-experienced instructors provide an unparalleled learning experience.
We understand that mastering video editing is a journey, not a destination. That’s why we offer:
- Lifetime access to course materials for all alumni
- Regular workshops on emerging technologies and techniques
- A robust network of industry professionals and fellow alumni
Whether you’re looking to break into the film industry, elevate your corporate videos, or become a YouTube sensation, Kennysoft Film Academy provides the skills, knowledge, and network you need to succeed in the world of video editing.
Conclusion
As you embark on your editing journey, know that you’re not just learning software – you’re learning to speak a visual language. You’re becoming a storyteller, a mood-setter, a magician of moving images.
Learning any video editing program is a gradual process, but by following these steps and investing time in practice, you’ll soon be able to create high-quality, polished videos. Whether you’re aiming to create personal projects or professional-grade videos, the key is to start small, build your skills gradually, and stay patient with the learning process.
Remember, the key is patience, persistence, and a willingness to experiment. Every new project you undertake will sharpen your skills, and before you know it, you’ll be navigating even the most complex software with ease.
